- Macintosh 68k emulation
- October 24, 2021 10:18am
All OldOs fans will know that there is little more satisfying than getting that old computer or operating system up and running. What’s even better than getting that old version of NT up and running is running an OS that shouldn’t work; that wasn’t intended to work on your hardware.
In this how-to, you be guided through the full process of setting up MacOS 7.5.3 and optionally the 7.5.5 update on Basilisk II, the freeware Mac II emulator designed by Christian Bauer, from scratch using only freeware, downloadable items. The end result will be a fully working MacOS system.
Required Tools & Other Downloads
To accomplish these tasks you will need to download the following sets of tools:
- Aladdin StuffIt Expander for Windows 5.0
- It is important to use a version such as this as the new version offered on Aladdin Systems website does not support the decompression of MacBinary files under Windows, and we will be doing that here.
- HFV Explorer
- A free utility to use HFS volumes under Windows
- Basilisk II Mac Emulator for Windows NT/9x
- Mac System 7.5 Network Access Disk
- Mac System 7.5.3 Install Image (in 19 parts)
- Mac System 7.5.5 Update for 7.5.3
- Aladdin StuffIt Expander 5.5 for Mac OS
- Apple Disk Copy
- iCab Net Browser
- (the only browser in development for 68k Mac’s)
- WinImage Trial Edition
- Optional: If you prefer using slow floppy disks compared ultra-fast disk images
- Mac Quadra 650 ROM
- Note: use of this ROM, without owning a Mac Quadra 650, may be legally dubious in your jurisdiction.
Preparation
Obviously, the first step is to download the files that are required and any optional extras you wish to use in your emulated or Macintosh system. Once you have downloaded all the files you will be using, follow the instructions below, and you will soon be looking at the smiley Mac that either know and love, or will soon learn to love! Install the applications for Windows, and create a directory to keep all the Apple files you will be using later.
Start Up Disk
Stuffit Expander Install
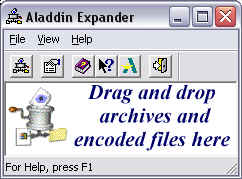
- Run StuffIt Expander for Windows.
- You will be greeted with a screen like the one shown. Locate the file you downloaded earlier called ‘Network_Access_Disk_7.5.sea.bin’, and drag it into the StuffIt Expander Window. This will decompress the file and create a new directory below the one in which ‘Network_Access_Disk_7.5.sea.bin’ was stored.
- Inside this ‘Network Access’ directory will be a file called ‘Network Access.Image’. That is the file we need.
Writing a physical boot floppy (optional)
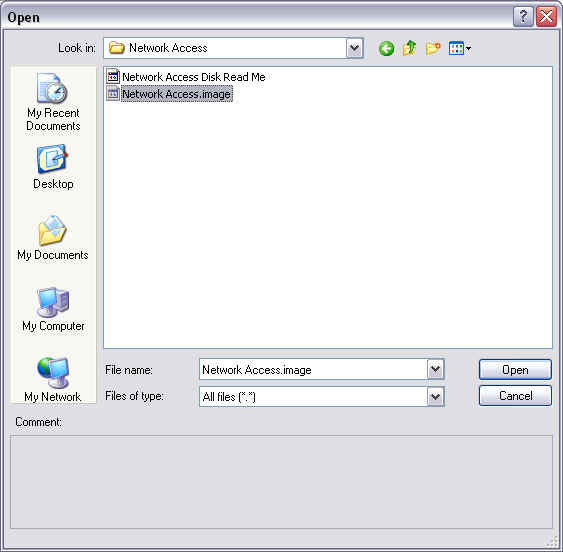
To physically write a boot floppy for Basilisk II then use WinImage Trial Edition that you downloaded earlier. From the ‘File’ Menu, select ‘Open’. Select to show all files in the dialogue at the base of the window. Open the newly made Network Access folder, and Select to open the ‘Network Access.Image’ file.
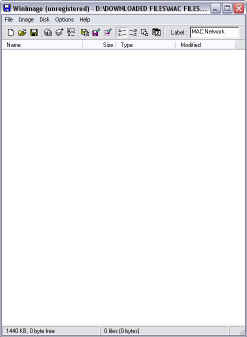
When you open this Image, NOTHING will be displayed in the WinImage Window, as shown below, DON’T WORRY ABOUT THIS. The Image is there.
From the disk menu, select to write a disk. Insert a blank 1.44Mb floppy disk into the disk drive you gave ticked under the ‘Disk’ menu. You have created your startup disk for a Macintosh Computer!
Preparing Hard Files for Basilisk II
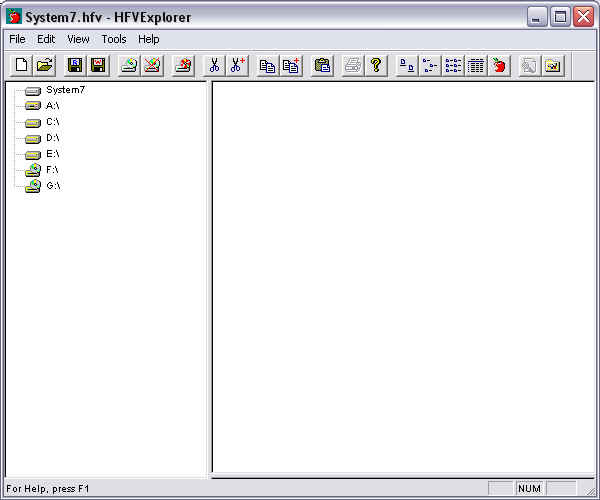
Open the program HFV Explorer from the folder you installed it to. Now, to format a new Hard Drive File for use in Basilisk II. For a start, lets format a 500 Megabyte Apple HFS Hard Drive. In the ‘File’ Menu in the HFV Explorer Window, select the option to ‘Format New Volume’.
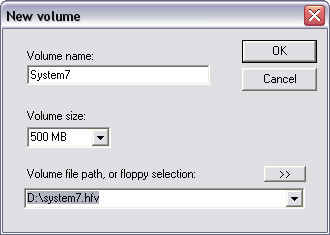
The Options selected in the Picture above will create a new ‘Hard Disk’ for use in the Emulated Macintosh. The ‘Mac’ will see this as a 500Mb Hard Disk Partition named System7, whereas it is really a file, stored in D:\system7.hfv.
(NOTE: The volume names and file names do not have to match, I merely do this for the sake of consistency. For example, if you name the file the same as the volume name in the emulated environment, it is easier to keep yourself right when opening volumes in HFV Explorer.)
Locate all 19 parts of the System 7.5.3 Install CD Image you downloaded earlier. Copy all these items to your Macintosh Disk volume (System7 in this example by dragging them to it). It is a good idea to create folders from within HFV Explorer in the same way as you would in Windows Explorer, just to keep track of all the files. Copy all the Macintosh files you will be using later on at this point as well.
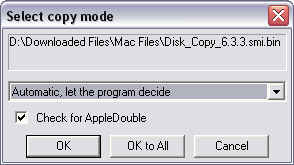
When the above dialogue is shown, always select ‘Automatic; let the program decide’ and ‘OK to All’ as is shown above.
Configuring the Basilisk II Emulator
Once you have unzipped Basilisk II to your chosen folder, open the program ‘BasiliskIIGUI.exe’. This is the configuration utility for Basilisk II. Since Basilisk II emulates a Macintosh system with a 68020, 30 or 40 Central Processing Unit, you will need a ROM file from one of these computers. You are only allowed to use a ROM from the computer you legally own. There are detailed instructions in the Basilisk Installation regarding dumping a rom from a real 68k Mac.
In the ‘General’ Tab:
- set the Boot Driver to ‘0: Boot from first bootable volume’
- Set the Model ID to ‘14 (Mac Quadra 900)’
- (No matter what ROM you are using, the Windows port of BII is optimized to use this model ID)
- Set the CPU to 68040
- Check the box for FPU Emulation
In the ‘Memory’ Tab:
- Set the RAM size to something that won’t cripple your PC, but won’t leave the Mac short either. 64 Mb is fine for most people.
- Click browse at the ‘ROM file path’ section to find your ROM file.
- Information about the ROM will be displayed in the box at the base of the Window, if you see ‘Corrupt’ or ‘Unsupported’, then you have incorrectly obtained the ROM from your Macintosh.
In the ‘Screen’ Tab:
- Completely your preference. I always like to set the ‘Colors’ value to 16 bit or 32 bit though.
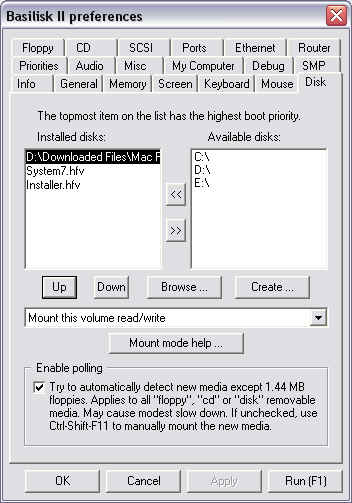
Next, move to the ‘Disk’ Tab:
- click on browse, enable all files in the file types field, and find the file ‘Network Access.image’
- find the Hard Disk File you created earlier
- Set the Network Install Image to hive higher boot priority by putting it up the list.
Your completed settings should look like this:
Go to the floppy and CD tabs to configure which of your host PCs removable disks you want to use in the same manner. We are now ready to boot the Emulated Mac.
First Boot
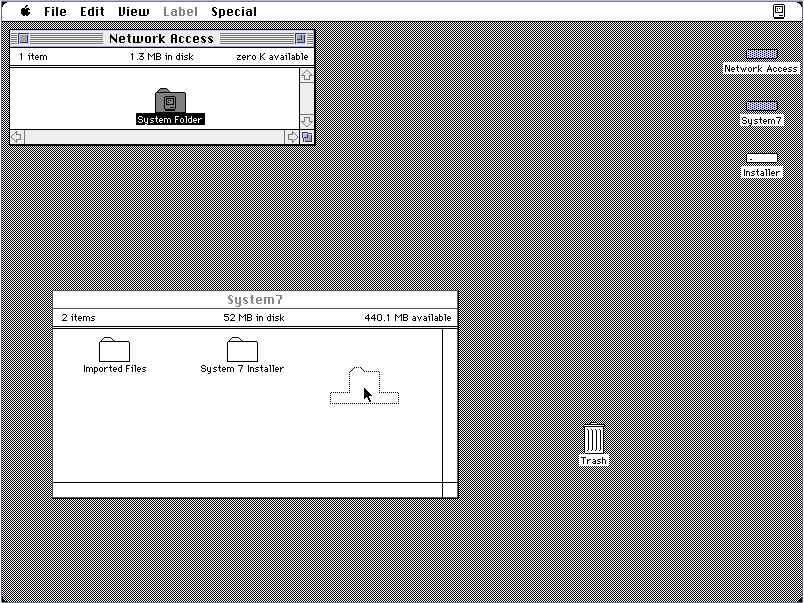
When you boot your Macintosh for the first time, the best thing to do is to copy the system folder from the Network Access disk Image to your System hardfile.
 )
)
You can then, if you chose to do so, shut the Mac down from the special menu, and the remove the Network Access Disk from list of installed disks in the BII GUI program. This will serve to make things slightly tidier, and also test if your copy of the System Folder was successful.
When you restart, you are now ready to install System 7.5.3.
Open up the folder in which you imported the 19 Installer part images. In my example, this folder was called ‘System 7 Installer’
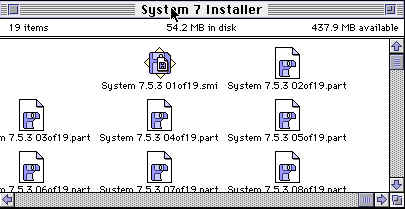
Double-click to open the first part (the Self Mounting Image or .SMI file). Agree to the terms of the license. This will mount the image of the CD Installer on the desktop.
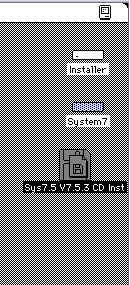
Double click to open the CD Image.
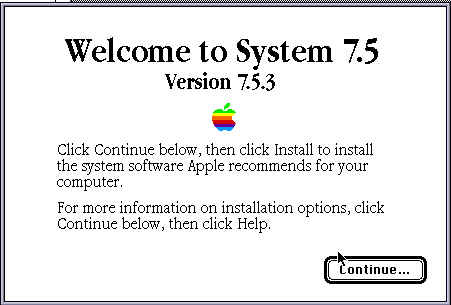
You are now ready to install The System Software. You will be greeted with a screen like this one:
From here on in, it is pretty much follow the bouncing ball. However, you should make sure that installation disk is selected as the one you wish to use in BII. Also Select Custom Install. My Setup looked like this:
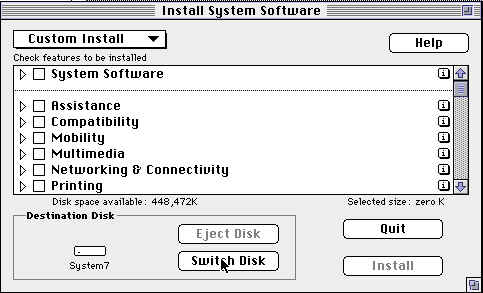
Chose the components you want to install. I chose pretty much all, except A/Rose under Networking and Extensions, as BII is incompatible with this.
When you have installed the system reboot the ‘Mac’. IMPORTANT NOTE: If you wish to install the Macintosh System 7.5.5 update YOU MUST choose ‘Easy Install’. There is a bug in the Emulator which causes any custom or other types of installs to fail when updated to 7.5.5.
Configuring the System
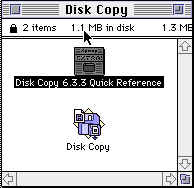
You can now start to install all the optional software you like. If you are installing the System 7.5.5 Update, it is best to do it now, when there are no applications installed on the system. To install the Update, you will also need the Disk Copy Application listed above. Locate the DiskCopy Image and open it. This will mount a floppy disk called Disk Copy onto the desktop. Open that image.
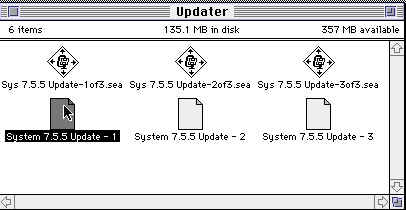
Copy the lower file onto the desktop, you will get a warning about a locked disk most likely, this is referring to the disk image. Just click OK. Now, go to the folder with the update disk images, there are three self extracting archives. Open them all.
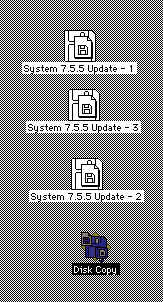
You should now have something very similar to the above set up. Drag the three files on the bottom row to the Disk Copy Application we moved to the desktop before.
NOTE: You can again, create update disks to use on a real Mac or for reference. Format three floppies to Mac 1.44Mb and simply copy the contents of the three images shown above to the three diskettes.
Open up the ‘disk’ Update - 1' and double-click on the installer. This will automatically update the system to 7.5.5
Congratulations
The groundwork is now done for making you Macintosh System. The OS is set up, and you have a number of Applications installed.
Please visit the download section of OldOS for more high quality Macintosh freeware and abandonware programs updated regularly.
- Old OS Authors
- http://oldos.org